


Add New Task Status
NOTE: This feature is available starting from version 1.6.2
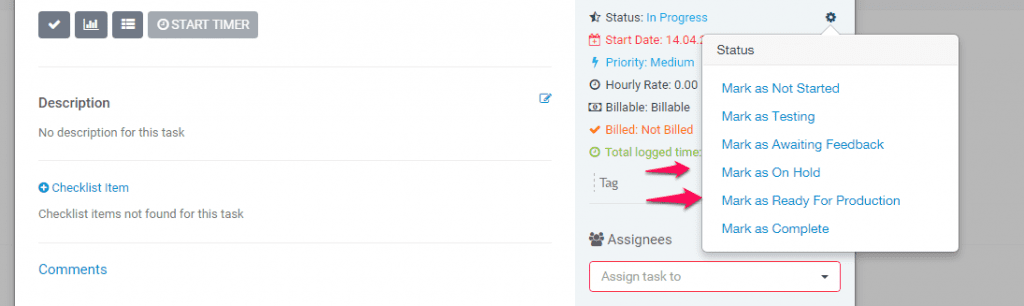
By default CRM ships with 5 predefined statuses, Not Started, In Progress, Testing, Awaiting Feedback, Complete but you can inject new statuses with simple action hook to fit for your needs.
We assume that you have some basic knowledge of reading php code for this article but won’t be that hard if you don’t have. You can just copy and paste the code and adjust the keys for your needs (see below keys explanation).
In this example you will add 2 new task statuses with name On Hold and Ready For Production
See below examples of code that you must add in application/helpers/my_functions_helper.php file (create the file if don’t exists)
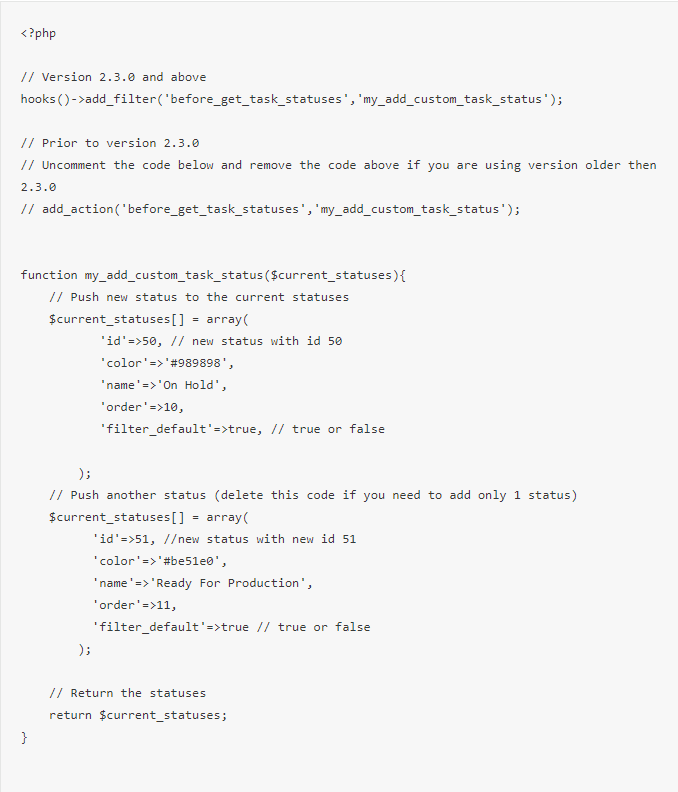
The ID for each status must to be unique.
- id – The id of the task status, its recommended to add higher id number to prevent overlapping the default system id’s for the task statuses. Eq now currently there is task statuses with id 1, 2, 3, 4 and 5 and in a future if new default task statuses is added with an id 6 and you already have injected your own status with id 6 can cause issues. Its not recommended to change the ID after there is tasks that are using the status id.
- color – Color for this status in hex format.
- name – The name of the status that will be displayed to users.
- order – The order of the status, eq for kanban order.
- filter_default – This option is used if you want to exclude the tasks that are using this status by default to be included in the lists tables. Eq if this option is false when you access the Tasks lists area (main tasks lists or related) by default the tasks that are using to this status wont be shown and you will neeed manually to use the filters to include in the table. A simple example here can be eq if you add status Cancelled, you won’t need cancelled tasks to be shown by default in the table.
After you adjust the code to fit for your needs save the file my_functions_helper.php and you will be able to see your new task statuses.
Recurring Tasks
Recurring tasks is a feature that allows you to create tasks that will repeat on a given period.
To create recurring task go to the Tasks menu in the admin area and click on the top left button New task

A popup modal will be shown to add new task.
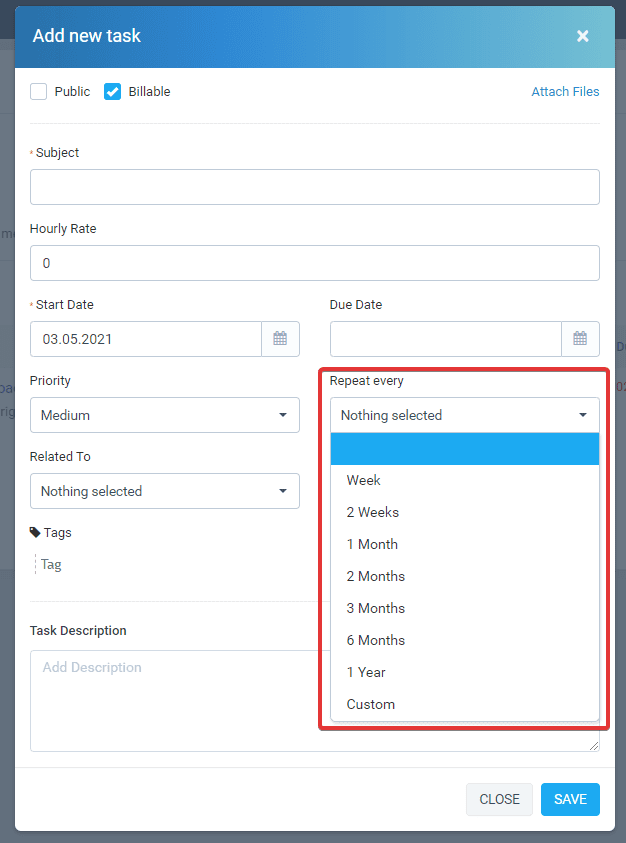
- Add task subject
- On the recurring field select repeat interval, you can also select custom interval to fit for your needs.
- Save the task
How the task will be repeated?
If you set start date 2016-09-27 and set repeat every week the task will be auto created after 7 days from the start date, in this case the task will be auto created on 2016-10-03.
How will I receive notification when the task will be re-created?
The task assignees will receive an email and web notification that new task is assigned to them or simply you will be able to notice the new task in the tasks list area.
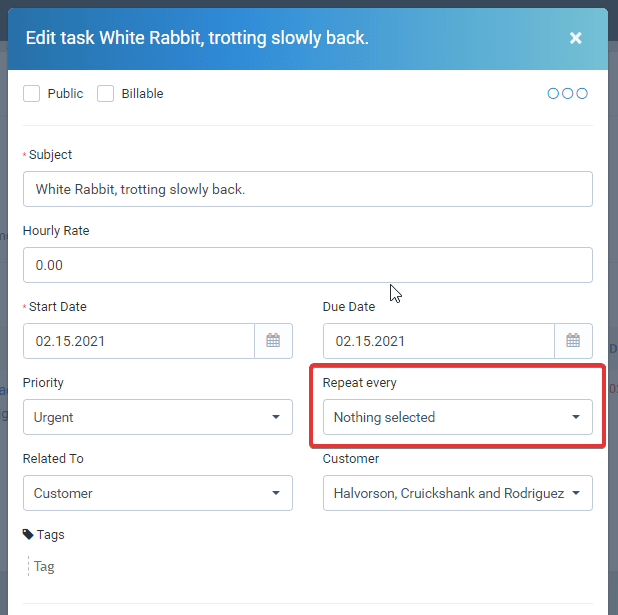
Stop a recurring task
First, find your recurring task by applying a filter to the Tasks table as shown below.
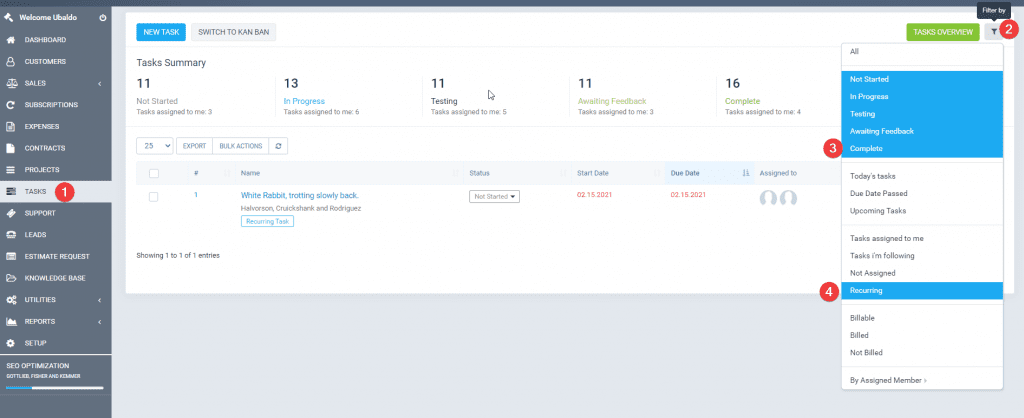
Then edit the task and set the Repeat Every drop-down field to empty.
Notes
1. This feature requires CRON Job setup to work properly.
2. This feature is added in version 1.2.4
Disallow project members to see all project tasks
By the default all project related tasks are visible to all project members.
If you want only to show the tasks where the staff member is assigned/added as follower you need to turn off Allow all staff to see all tasks related to projects
To achieve this go to Setup->Settings->Tasks and set Allow all staff to see all tasks related to projects to NO
If the staff member have permission for tasks VIEW or is admin then this member will be still able to see all tasks.
Task Timesheets
Task timesheets is all started timers for specific task, timesheets are stored separately for each task started by the task assignees.
To view all task timesheets while the task modal is open click on the timesheets icon.
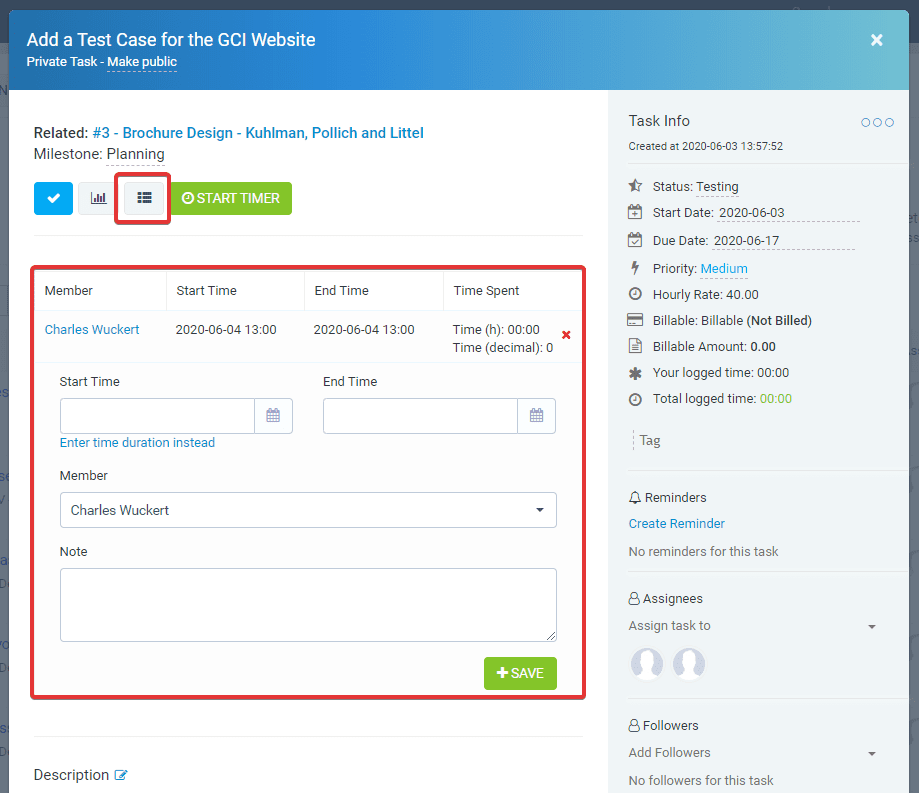
Below this button a table will be shown with all task timesheets related to this task.
You can insert manualy timesheet for specific task just using the below table form area.
To add new timesheets you will need to select Start Time, End Time and Member. Note that in the dropdown member area will be shown only task assignees.
Bill Tasks
1. To invoice non-project tasks when creating invoice there is dropdown just to the right side of the items dropdown BILL TASKS.
After you select a customer this dropdown will be auto-populated with all the tasks that are associated with this client (Note that projects tasks are excluded here check below no.2)

2. You can read more here how to invoice a project tasks: Invoicing Project Tasks
Linking task to features
Task can be linked to any important features in CRM to keep track of your work and assign important actions to your agents.
Go to Tasks menu item from the main admin menu and on the top right button click New Task
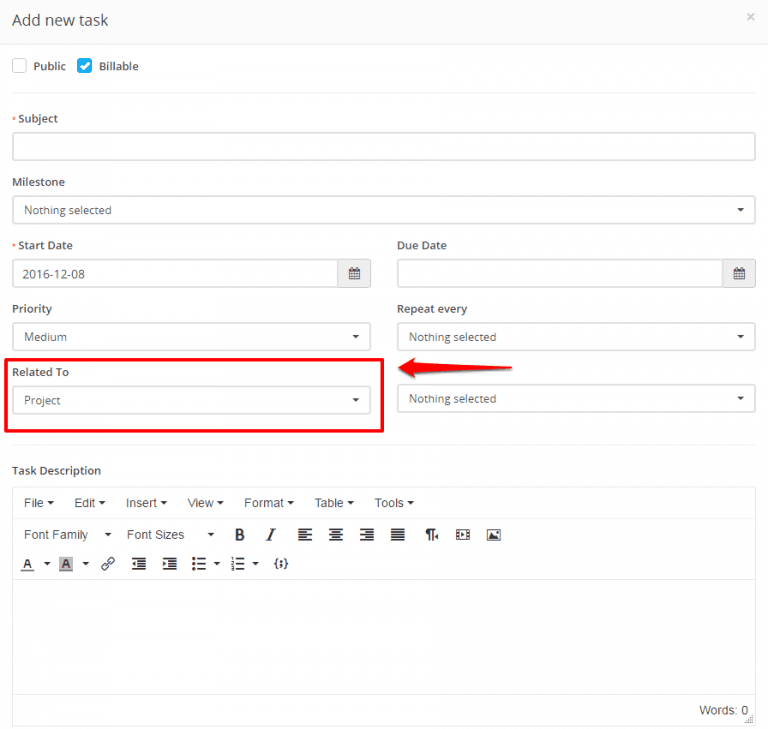
On the Related to field select where this task will be linked.
After you select the feature where the task will be linked on the right side a dropdown will be shown to select specific eq. project.
Tasks can be related to many features in CRM.
Create New Task
In order to create a new task, from the main menu navigate to Tasks and click on the New Task button.
- Subject – Enter the subject for the task in order to easily identify it.
- Hourly Rate – Set task hourly rate
- Start Date – Set the date when the task should be valid.
- Due Date – Set the due date when this task should be finished.
- Priority – Select task priority, Low, Medium, High, Urgent.
- Repeat Every – If you want to mark this task as recurring to be repeated based on the period selected, select recurring options accordingly to your needs.
- Related To – If you want to associate the task to a specific feature like project, customer, invoice etc.. you can choose from this list.
- Tags – Add task tags for easier identification, for example, bug, wordpress, etc…
- Task Description – Provide additional information for the task.
- Click Save
After you create the task, you will be able to add assignees and followers directly in the task modal from the right side.
When a follower or assignee is added to the task, the user will receive an email and bell notifications that he/she is added as assignee or follower to the task, if you need to adjust the email templates that are sent to the user, you can do this in Setup->Email Templates.
Task Comments
The users that are able to view the tasks, like creator, assignees, and followers, can comment on the task for further collaboration.
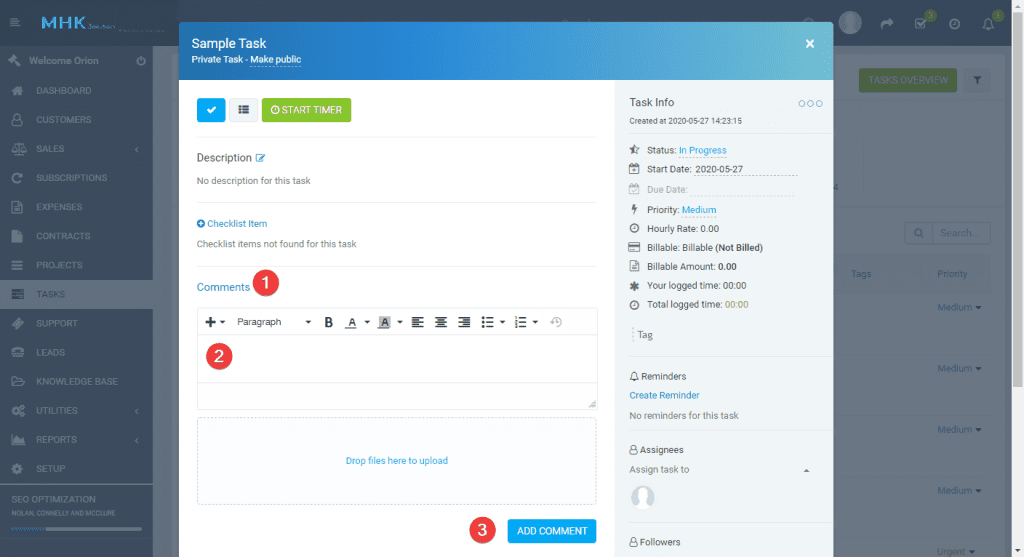
To add task comments, inside the task modal, click on the Comments link and click on the empty text area to add comment content.
If you need to attach files with the comment, you can just drag and drop the files inside the marked upload files area.