


Complete Guide to Creating and Sending Surveys
From Building Mail Lists to Viewing Results — Everything You Need to Run Effective Surveys
Creating mail lists
After you added the survey a new column will be shown. This is the part where you can send the survey.
You need to select particular mail list for this survey. You can also select multiple mail lists.
Select the desired mail lists and click send. All the emails will be added to Cron Job queue.
The general purpose of the mail lists feature is used for sending surveys.
To create new mail lists go to Utilities -> Surveys -> Mail Lists and click on the right side button New Mail List
Give your mail list name and the custom fields feature is optional. The custom fields feature is if you want to add firstname,lastname, etc.. for this email
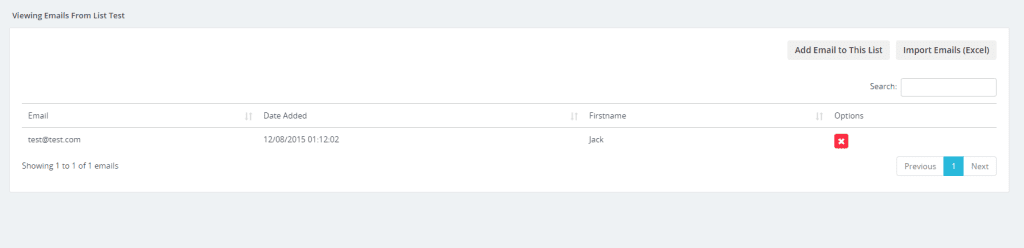
After you have created this mail list open the list and you will be able to add new emails.
Sending surveys
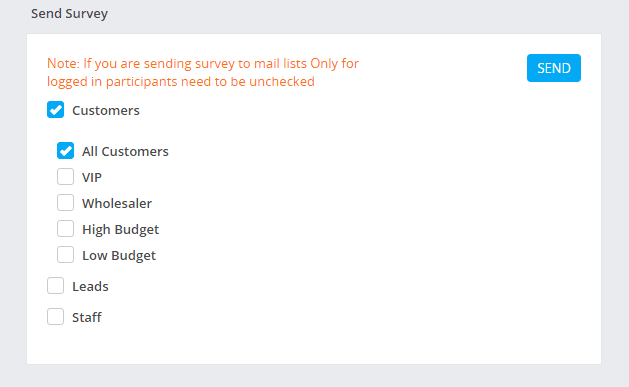
To send a survey to mail lists, navigate to the survey edit area and on the right side, click on the tab Send Survey

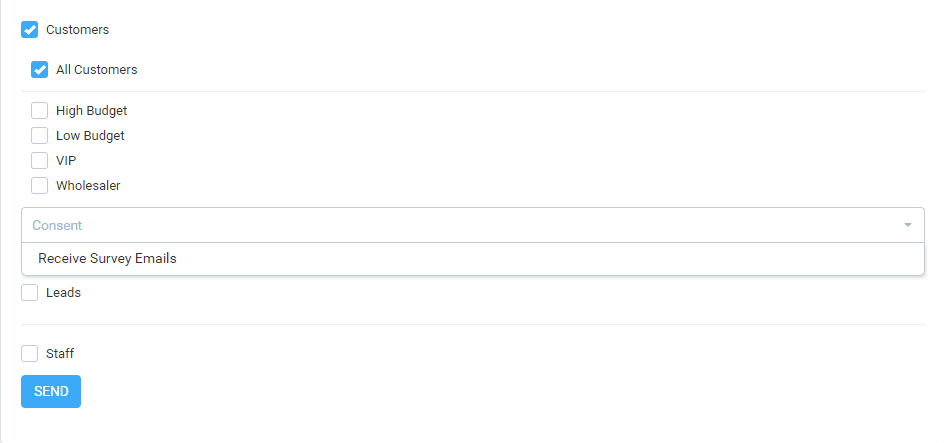
You can select from all the 3 predefined mail lists to send the survey to or you can create your own custom mail lists in Utilities->Surveys->Mail Lists.
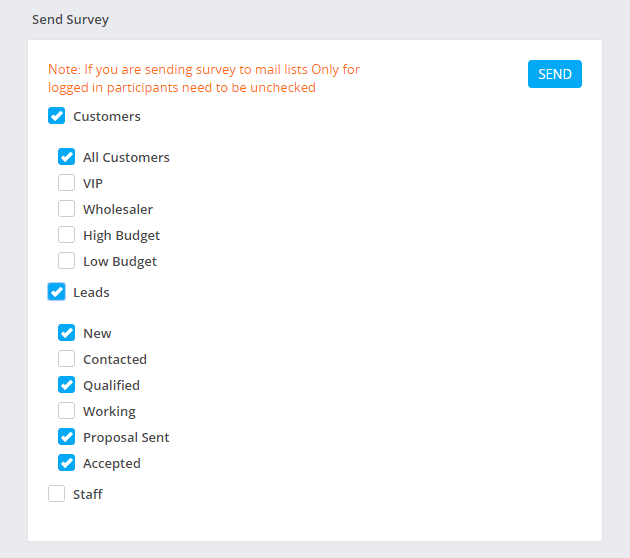
Additionally, when you click on Customers or Leads, you can even select customers that belong to a specific group or leads that belongs to a specific status.
Because the most hosting providers have a limit for sending a specific amount of emails per hour, survey emails will be sent via CRON JOB. The amount of emails to be sent per hour can be configured in Setup->Settings->Cron Job->Surveys
Survey options
There are few related options for the survey that needs to be re-checked before sending.
- Survey short description (View Description – Optional) – This is the HTML area where the user will fill the survey questions.
- Survey description (Email Description) – Make sure you configure the survey email content, here you may want to include the {survey_link} merge field, so the user can click on the link and open the survey HTML area, if you are sending regular mass emailing but just using Perfex CRM surveys feature, you don’t need to add the {survey link} merge field.
- From (displayed in email) – Additional FROM header, leave this empty to use the default email configured in Setup->Settings->Email, keep in mind that if you decide to fill the FROM header, make sure that you add email related to your domain and the email that actually exists, many email services will see this email as spam if the FROM header is not properly configured.
- Only for logged in participants (staff, customers) – If you check this option, do not select any other lists the survey to be sent other then staff or customers, additionally you may want to mention in the email description that they need to login in order to fill the survey.
If you have GDPR enabled and enabled consent for GDPR for contacts or leads, you can select the survey to be sent to specific contacts/leads that have given consent for a purpose. As an example, if you added consent purpose eq. Receive survey emails, from the drop-down you can select this consent purpose and only the contacts/leads that have given consent to receive survey emails, will receive the survey.
New Survey Questions
With you can add new questions in a very simple way. After creating the survey on the right side you will be able to add questions.
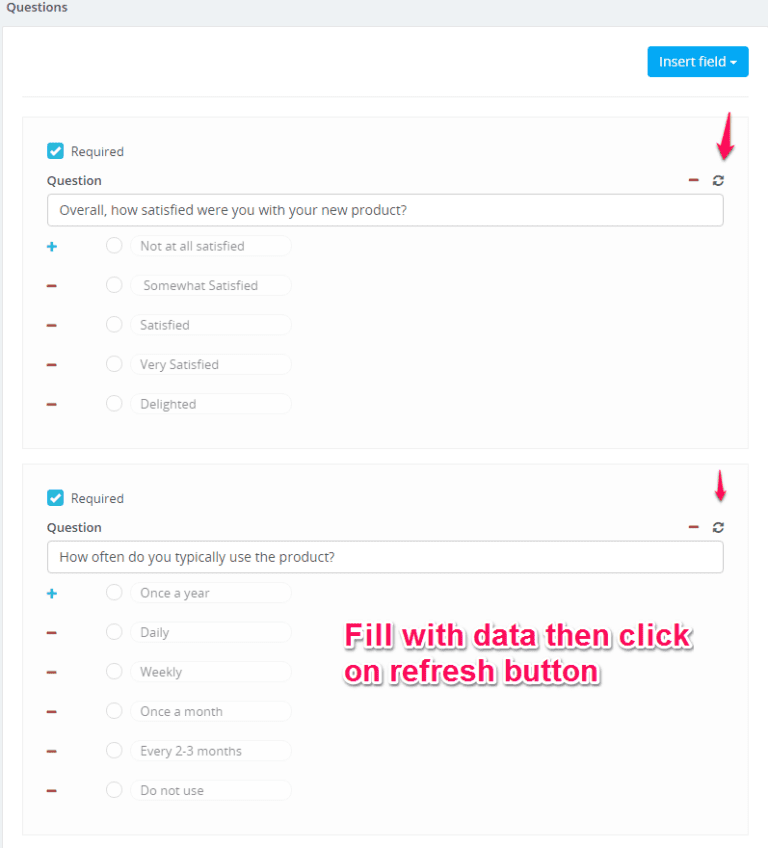
Click on the button Insert Field and a dropdown will be opened you need simply to click on the desired question type you want to add.
Available survey question types:
- Checkbox
- Radiobox
- Input Field
- Textarea

When you add new question the question is automatically saved to database. You only need to update the question when adding/editing the text by clicking on the reload button on the right side.
When you finish adding all the survey question you can preview the survey clicking on the eye button on top.
Including mail list custom fields
If you want to include custom fields in your email template from particular mail list you will need to add manually to the email template content.
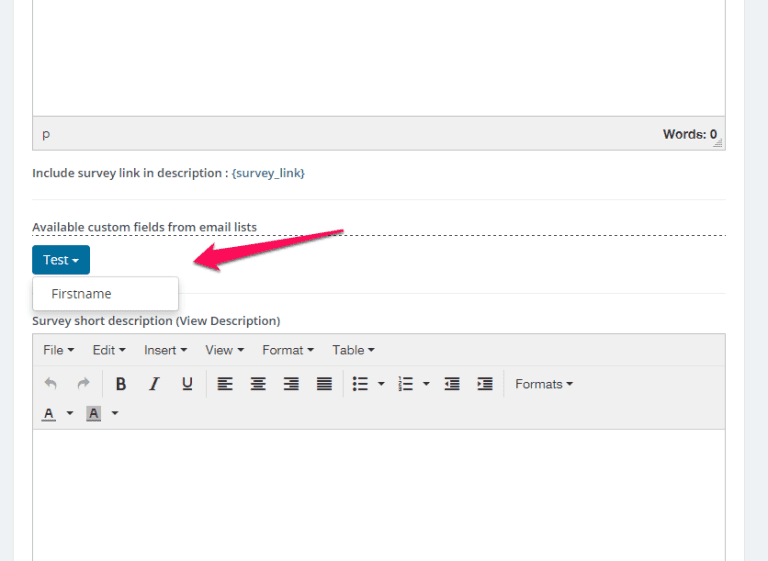
If you have multiple mail lists with custom fields all will be listed here.If the mail list dont have any custom fields wont be listed.
Viewing survey results
While listing survey results click on the chart button on the right side. All results from this survey will be available to you.
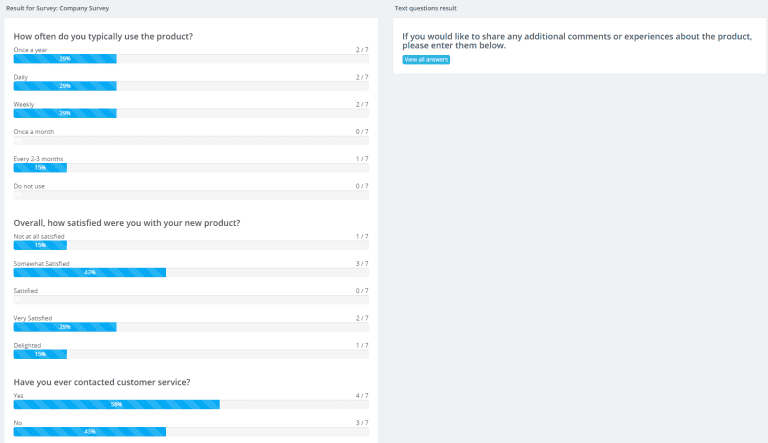
If survey does not have any participants the chart button wont be shown while listing the suveys.
New Survey
Navigate the the aside menu Utilities and click Surveys – > New Survey.
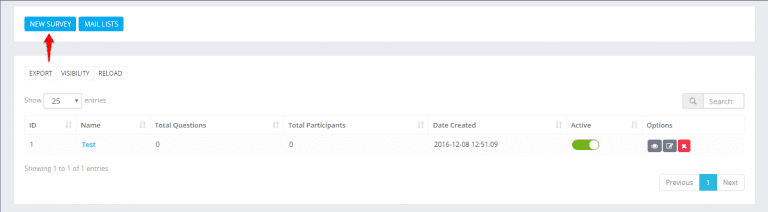
Populate the fields with basic data necessary for the survey then click on the submit button.
You will be able to add questions after inserting the survey.
Sending survey to mail lists
If you are sending survey to custom added mail lists Only for logged in participants need to be unchecked.
Select the custom made mail lists you want to send and click on the send button.