


Projects
Add New Project Status
NOTE : This feature is available starting from version 1.6.2
By default CRM ships with 5 predefined statuses, Not Started, In Progress, On Hold, Cancelled, Finished but you can inject new statuses with simple action hook to fit for your needs.
The statuses Not Started and Finished are core statuses and should remain untouched in order everything to works well.
We assume that you have some basic knowledge of reading php code for this article but wont be that hard if you don’t have. You can just copy and paste the code and adjust the keys for your needs (see below keys explanation).
In this example you will add 1 new project status with name Planning
In application/helpers create file my_functions_helper.php and add the following code:
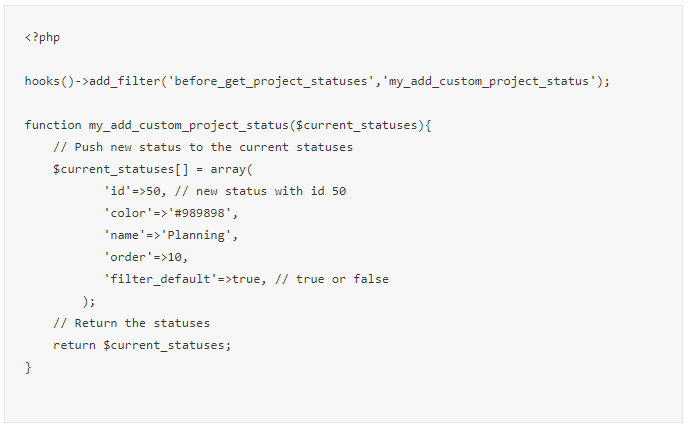
The ID for each status must to be unique.
- id – The id of the project status, its recommended to add higher id number to prevent overlapping the default system id’s for the project statuses. Eq now currently there is projects statuses with id 1, 2, 3, 4 and 5 and in a future if new default project statuses is added with an id 6 and you already have injected your own status with id 6 can cause issues. Its not recommended to change the ID after there is project that are using the status id.
- color – Color for this status in hex format.
- name – The name of the status that will be displayed to users.
- order – The order of the status.
- filter_default – This option is used if you want to exclude the projects that are using this status by default to be included in the lists tables. Eq if this option is false when you access the projects lists area by default the projects that are using to this status wont be shown and you will neeed manually to use the filters to include in the table.
After you adjust the code to fit for your needs save the file my_functions_helper.php and you will be able to see your new project status

New Project
To create new project go to Projects from the aside menu and click New Project on the top left button.
- Project Name – The name of the project – Visible to customer
- Select customer
- Billing Type – there are 3 billing types for the projects. (auto-selected from the most used billing type)
Billing type cant be changed if any billed tasks found for the project.
- Fixed Cost
- Project Hours – Based on project total billable hours
- Tasks Hours – Based on tasks total billable hours – Total is calculated per task Hourly Rate (When creating task you need to set hourly rate for these tasks if billable.
- Select project members – Only project members and staff who has permission Manage Projects will be able to access the project.
- Start Date
- End Date
- Project Description
Project Settings
Each project can have own settings based on the customer.
- Allow customer to view tasks
- Allow customer to comment on project tasks – Not applied if Allow customer to view tasks is unchecked.
- Allow customer to view task comments- Not applied if Allow customer to view tasks is unchecked.
- Allow customer to view task attachments- Not applied if Allow customer to view tasks is unchecked.
- Allow customer to view task checklist items- Not applied if Allow customer to view tasks is unchecked.
- Allow customer to upload attachments on tasks- Not applied if Allow customer to view tasks is unchecked.
- Allow customer to view task total logged time
- Allow customer to view finance overview – (Finance overview for tasks is not shown if project Billing Type is Fixed Cost)
- Allow customer to upload files
- Allow customer to open discussions
- Allow customer to view milestones
- Allow customer to view Gantt
- Allow customer to view timesheets
- Allow customer to view activity log
- Allow customer to view team members
Notes:
- When creating new project initialy the default project settings will be taken from the last project. You can adjust if any changes are required.
- Project currency will be your base currency or the customer currency. If the customer have setup currency different then the base currency the currency will be used from the customer profile.
- If your staff members are able to see all projects make sure that the member dont have permissions for projects VIEW. VIEW allows staff member to see ALL projects. If you only want them to see projects they are assigned (added as members), do not give VIEW permissions.
Timesheets
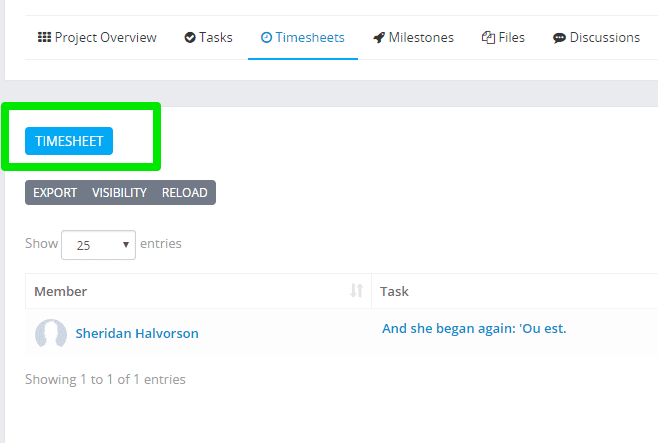
Project timesheets are all started timers for tasks related to specific project.
To view all project timesheets while viewing the project click on the timesheets tab.
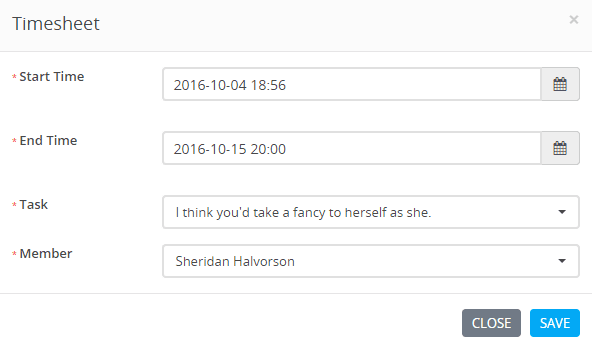
- Select start time and end time from the calendar.
- Select task where this timesheet will be linked.
- Select staff member
- By default the logged in user will be auto selected
- If the user dont have permission for projects EDIT or CREATE only logged in user will be available to select as timesheet staff in the dropdown
Invoicing Project
Invoicing project is recomended to do only from the project area via the Invoice Project button on the top right side to keep track of all invoices created for the project.
Project Invoice Info
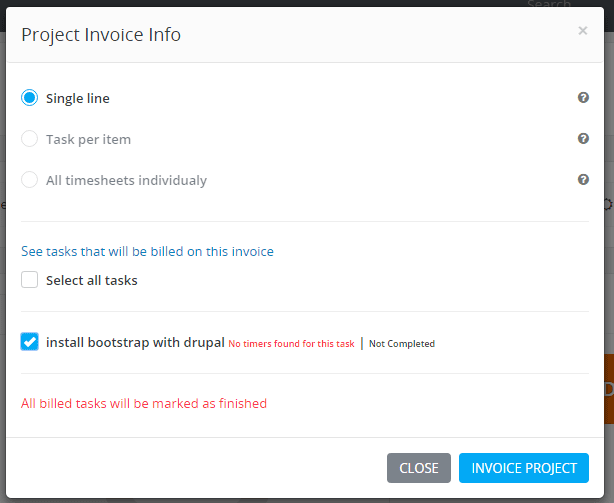
There is 3 types of how the invoice items will be structure when invoicing the project.
- Single Line – Not applied if project Billing Type is Task Hours
- Item name: Project name
- Description: All tasks + total logged time per task
- Task Per Item – All billable tasks per item – (Not applied if Billing type is Fixed Cost)
- Item name: Project name + Task name
- Description: Total logged time
- All timesheets individualy – Applied all billable timesheets from tasks – (Not applied if Billing type is Fixed Cost)
- Item name: Project name + Task name
- Description: Timesheet start time + end time + total logged time
Tasks that will be billed
With CRM you have the ability to choose what tasks to bill when invoicing project.
With CRM you have the ability to choose what tasks to bill when invoicing project.
To see the tasks that will be billed click on See tasks that will be billed on this invoice, you can adjust per your requirements.
If task is note complete when you click See tasks that will be on this invoice on the right side you can see a message Not Complete. Another message is auto added there with red if the task don’t have any timers but you want to bill the task. Check the image below.
Tasks with future start date cannot be billed.
Actually they can if you check them. By default the tasks with future start date won’t be checked which is logical.
Notes
- All billed tasks will be marked as finished (If any tasks found not finished) – No notification sent to assigned staff members.
- After the task is billed you cannot start timers or bill the task again. If is required to bill again you need to re-create the task.
If customer have different currency set then default currency the project currency will be the currency of the customer.
Disallow project members to see all project tasks
By the default all project related tasks are visible to all project members.
If you want only to show the tasks where the staff member is assigned/added as follower you need to turn off Allow all staff to see all tasks related to projects
To achieve this go to Setup->Settings->Tasks and set Allow all staff to see all tasks related to projects to NO
If the staff member have permission for tasks VIEW or is admin then this member will be still able to see all tasks.
Pin Projects
If you are working on specific projects everyday and you need to access them everyday there is an option to pin the project. The pinned projects will be shown on the bottom left side from the admin main menu
To pin a project from the main menu navigate to Project and open the project you want to open. On the top right side there is an Action button, click it and then click on Pin Project dropdown link.
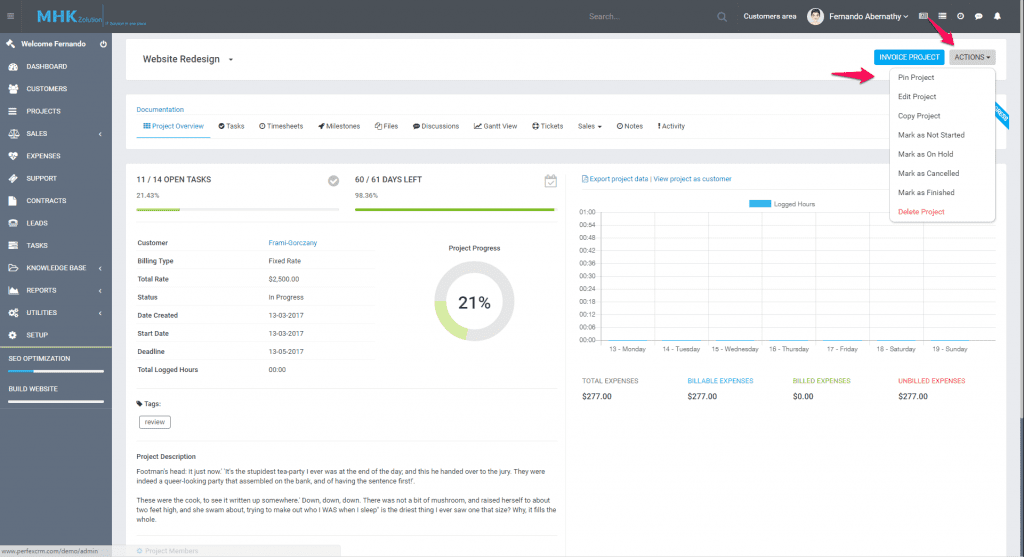
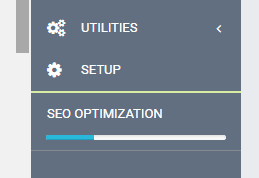
After pinning the project you will be able to see it and access directly on the left side of the admin menu.
Keep in mind that you will want to unpin this project after is marked as finished.
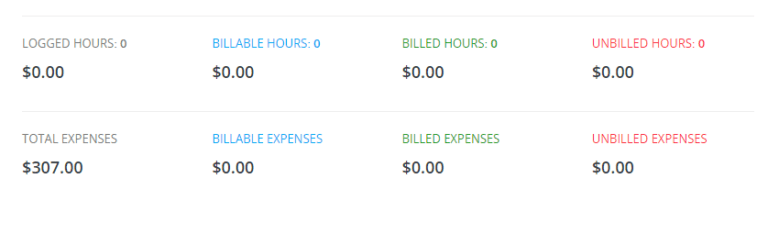
Finance Overview
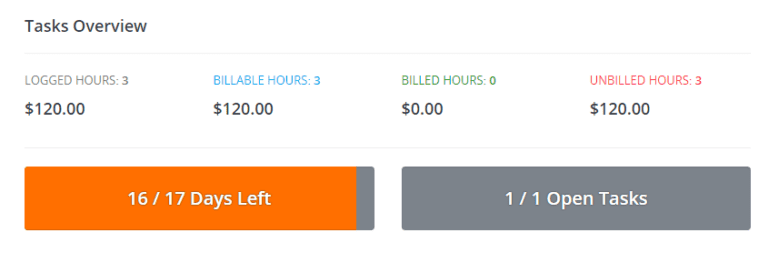
Finance Overview is showcase of all logged project timesheets together including project expenses.
- Logged Hours – Shows total logged project hours Billable and Not Billable
- Billable Hours – Shows total billable hours – All time
- Billed Hours – Shows total invoiced hours.
- Unbillable Hours – Shows total unbilled hours. Ex. Means that the project have 3 unbilled hours from the last project invoice (If any).
The total values are calculated based on the Billing Type

Project have logged total 3 hours and Rate per hours in project settings is set 40$ the calculation will go like this:
40$ x 3 = Total 120$
Example billing type Task Hours
The total per hour in this case is taken from the task Total Per Hour
Example:
Fix firefox bug – Total per hour is 25$
Create new table in database – Total Per hour is 40$
Task 1 (Fix firefox bug) have logged 1 hour and Task 2 (Create new table in database) have logged 2 hours.
The calculation goes like this:
25$ x 1 hours (Task 1 – Fix firefox bug)
40$ x 2 hours (Task 2 – Create new table in database)
Equal to 105$